Panty Hose Storage of Sweet Vidalia Onions

Such a strange title, I know. But how else are you gonna keep those sweet onions so long?

This early summer I bought not 1 but 2 cases of Vidalia Onions at a produce auction. At a cost of $16 per case and with each case weighing 36 pounds, I knew it was a great deal – less than 50 cents per pound. Obviously, we love onions around here!

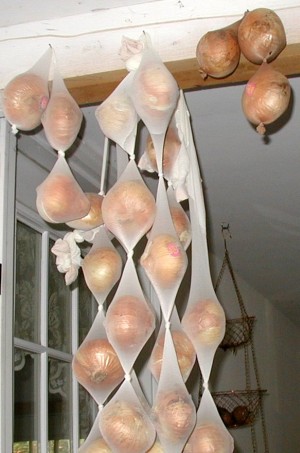
We used the Vidalia onions freely throughout the summer in all kinds of cooking. During the hot weather the onions were taken to the cool basement and hung in panty hose, or nylon stockings.

One onion was placed gently in each toe of a lady’s nylon stocking and an overhand knot was tied at the top of each onion. Another onion was put down each leg and another knot was tied on top of each onion. The pattern was repeated until onions filled the legs. The nylons were hung so the onions could hang freely.

Vidalia onions hanging in nylons.

Now that the garage is cooler than the basement, we have Vidalia Onions hanging in knotted nylons in the garage, just outside the kitchen. Note that the onions don’t touch each other.

The only caution here is to to take a pair of scissors and cut below the next to last knot to remove the next onion.

When sweet onions are stored for any length of time the areas where the onions touch one another are typically the first places to decay. For longer term storage of sweet onions it is important to handle them gently, and to devise a way to not let them touch.

Another way to store the sweet onions is to wrap each one individually in newspaper and then store in a refrigerator crisper or drawer section. The newspaper serves the same purpose as the knotted panty hose, which is to separate the onions and not allow them to touch one another. If refrigerator crisper space is limited, then hanging onions in a cool place is preferred.

Our Walla Walla onions from the garden are stored loose in a bin in the garage. We’ve handled them gently to limit bruising and we’ll use them pretty quickly so we aren’t worried about them going bad.

Well, before you think our way of storing onions is getting pretty crazy, you should know we learned it from a fellow who lives in Georgia, near Vidalia country. We’ve used this technique for years and if this year can be a good example, we’ve already stored the onions from early June to early November with no ill effects.

Does anyone else store their Vidalia onions so carefully?

ROI of 250% on Walla Walla Onion Harvest

The last stragglers of the spiderflowers, butterfly bush, and heritage flowers lost the fight two nights ago when we had a hard freeze. First night down to 28F killed off the garden for the year. I’ll have to go dig up the canna lilies and dahlia bulbs real soon.

The only thing that appears to not have been taken by the freezing weather is the celery and it still looks remarkably alive. Oh yeah, some lettuce is still growing green. It was re-seeded from previous lettuce plants that were allowed to flower. One kind in particular, an Austrian heirloom type of Romaine lettuce, called “Freckles”, has re-seeded like crazy.

It’s so sad to say goodbye to the summer tomatoes and peppers and basil!

We harvested the garden onions a couple weeks ago. We knew it was time to harvest the onions as the green shoots had pretty much turned brown and had flopped over onto the ground. It was obvious that they weren’t growing any more.

The onions were pulled up and the shoots were cut off a couple inches above the bulbs. Any excess dirt clinging to the roots was brushed off and the onions were laid out on a plastic sheet. The onions were positioned so that none were touching each other and they were allowed to dry for a long week. The sweet Walla Walla onions will be used in the kitchen over the next couple of months.
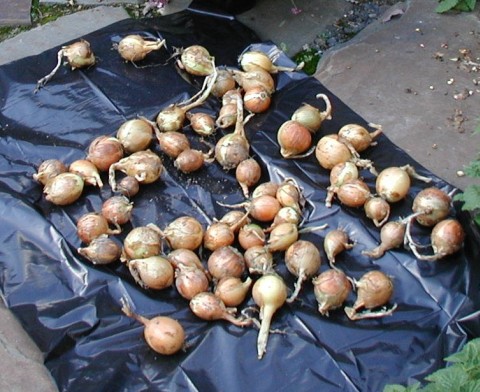
Freshly harvested Walla Walla onions.

Freshly harvested Walla Walla onions from the vegetable garden. Photo taken on 11OCT08.

Walla Walla Onions were put in the garden as small onions, 1/8 inch in diameter, in late May. We purchased two 6-inch square flats with three rows of the baby onions that numbered approximately 4 dozen per flat. Some onions were eaten as ‘green-tails’ during the summer and we still harvested 50+ small to medium onions.

Dried onion weight is estimated at 5 pounds – at least. We paid only $1.30 for each flat of onions – each producing a row of onions when planted a few inches apart. The ones that were planted too close together were simply eaten first.

For every dollar spent on onion input, we got back at least two dollars worth of onions at the end of the growing season. Seeing that we ate a few of the onions as they grew the benefit was higher than doubling our money, probably closer to tripling our investment. Not that I want to become an onion farmer, but isn’t it nice that we’ve actually gained something in addition to the time spent outdoors?

Let’s see what our return on investment (ROI) was for growing Walla Walla Onions. ROI is calculated by dividing the profit by the total investment and expressing the result as a percentage.

ROI (%) = ( Profit / Investment ) x 100%

For example, our outlay of money was $2.60 to purchase the onions. Since we’ve obtained other benefits for the time and labor spent on planting the onions, tending the onions as they grew and harvesting them, we’ll say our total investment was only $2.60.

Purchasing sweet onions at the grocery store will set you back $1.69 per pound when they’re on sale, or $1.99 per pound at regular price. For a nice round figure, let’s say our harvest was 5 pounds of onions at a value of $8.45 to $9.95, depending on whether you use the sale or regular price of onions. How much are you paying for onions these days?

Profit is figured as the value of the harvest minus the investment, or $(8.45 – 2.60) = $5.85 to $(9.95 -2.60) = $7.35.

ROI ranges from (5.85/2.60) x 100% = 225% to (7.35/2.60) x 100% = 283%. So, on average, we can say that our ROI for growing onions was 250%. If you can get any other investment to give you such returns, you’re probably doing something illegal!

Ok, so we’re not dealing with great big numbers here, but I did get the validation I was looking for. I wanted to know, “Is my time spent gardening going to benefit my pocketbook as much as my mind and body?” The answer is obviously, YES, it is.

It feels really good to eat food that we’ve produced. It feels fantastic to avoid paying the high supermarket prices of today. For a few months I can pass by the onions at the grocer with a big smile on my face knowing that we’re stocked up on our onions.

You may be asking, “But what about the investment of time, labor and fertilizer and such?” I think I hoed the onions only twice this growing season and I may have pulled a few weeds in between hoeings. No fertilizer was used, so there was no other money input. Time spent preparing the soil in the beginning of the growing season can be spread across all the crops.

It’s good activity to keep us young, so the time spent gardening is not considered a cost in growing our vegetables. I’d much rather stay at home and pull a few weeds than drive half an hour to the grocery and give my money to someone far removed from the farmer for food that may have been grown in a far away land!

I’m hoping that more people will return to such wholesome ways as creating a Victory Garden at home. It’s not difficult to do, and actually, vegetable gardening can be very rewarding, and delicious, too!
Sassafras Leaves Give Flavor to Soups as Filé Spice

Ever hear of Gumbo? If you’ve not been to Louisiana, maybe you’ve never tried it or even heard of it. Gumbo is an African word for ‘okra’, which is a green vegetable that is mainly raised and consumed in the Southeastern U.S.

Personally, I’m not very fond of okra. Ok, I can’t stand that slimy stuff, and that’s always been my experience with okra, unless it’s been in a “gumbo”, or thick soup. Okra thickens the gumbo which also has some type of meat, chicken and sausage usually, in a seafood broth made from cooked shrimp heads or shells, and a few veggies, like tomatoes, peppers, celery, onions and garlic.

It turns out that Creole folk adopted a custom from the Native American Choctaw tribes, who added crushed sassafras leaves to soups as a flavoring and thickening agent. Today, the spice from ground sassafras leaves is called Filé, pronounced fee-lay. When Filé powder or filé spice is used in gumbo-style soup, it may be called Filé Gumbo.

I think we must have used a Yankee version of filé this summer when we made ketchup. We hung sassafras leaves along with some pickling spice in a cheesecloth bag in the pot as we cooked down tomatoes, peppers and onions into ketchup – which is another story, Making Homemade Ketchup.

Filé spice consists of crushed, dried Sassafras leaves. It’s not hard to make it at home, provided that you can find some Sassafras. Go to any state forest in the Eastern U.S. and ask a ranger where you can see some Sassafras trees. Chances are great that you’ll find Sassafras at the edge of the woods. Sassafras leaves are unmistakable, so never fear!

If you’re not into going into the woods or if you have no desire to make your own filé, of course you can order Gumbo Filé online.

Harvest the young, green leaves on the August full moon for the best flavor. Seeing that it’s October as I’m writing this and the fall colors are well upon us, it’s not a good time to harvest Sassafras leaves for making Filé spice. I don’t think I’ll find too many green leaves, and certainly not young leaves, but I’ll give it a try and report back later on how it goes.

Once you harvest the Sassafras leaves, they are to be dried out of the sun for at least a week. Longer is fine. Once the leaves are harvested the making of the filé can happen at a much later time.

Crush the leaves with your hands and remove all the bits of stems. Grind leaves into powder using a coffee grinder or a spice mill or get busy crushing with a mortar and pestle. The crushed dried sassafras leaves should be a green color, not brown as you will find in some stores.

If you are going to buy filé in a store, check the label first. Some other spices or ground dried herbs are passed off as filé, hence a light brown color.

Store the powdered filé in an air-tight container. A spice jar works great so it can be passed around the table and sprinkled on soup to each one’s taste.

Can’t add filé during cooking because it makes the soup stringy and that’s downright undesirable. When soup is taken off the heat you can add filé or offer it in a shaker bottle at the table so that way everyone can add as much as they like. Just don’t add filé to the pot if the pot is going to be re-heated on the second day!

Gotta go check for some green Sassafras leaves!

Catnip Harvest: Strong-Scented Fun for Kitty and Tea for You

Catnip is probably one of the first herbs that people learn about that has a purpose other than food for humans. We all adore our pets and provide them much love and affection, not to mention toys and treats.

Felines love their catnip and we’re only too happy to oblige them their desire. After all, we don’t have mice. We have cats.

We see to it each year that wild, native catnip, Nepeta cataria, seeds are spread about in offering to the little mousers everywhere. Cats rub against the plants and chew on a leaf now and then. One of the big boys holds down a fresh leaf that I’ve given him with one paw and licks the leaf to shreds until he’s down to the stem.

Flowering catnip, pre-harvest.

Flowering catnip, pre-harvest. Photos taken 16Sep08.

For fun during the cold season, when catnip will only be growing in a planter at our latitude, we harvest a few plants and dry them.

Harvesting the catnip is as easy as pulling up the entire plant, or cutting the stems off near the ground, and laying the stems on a clean surface for a few days. Don’t pile a lot of stems together so that the leaves can dry out and turn the stems everyday so all parts of the plant can dry. I covered a bench with a large black plastic bag to be able to collect the seeds that might otherwise roll away.

Cut off the flowering tops and carefully strip the leaves from the stems so that they’re not crushed. Careful handing will help to retain the aromatic compounds that attract the kitties.

Drying catnip.

Catnip, dried on a clean surface.

Not only do cats enjoy catnip, but people can enjoy it, too. Use the dried leaf in making tea – it’s especially nice blended with any of the mints.

Once your catnip is completely dry save it in a glass container.

If you’re looking for a little catnip or just the seeds, check out my ebay auctions of catnip this weekend.

White Sage: A Fragrant Incense For Air Purification

Until I started reading about Sweet Annie, the fragrant Artemisia annua, I did not know that one of my favorite scents came from a related plant.

White Sage, Artemisia ludoviciana, also known as Western Mugwort, is native to the western U.S.

Native Americans have used white sage for many, many moons in dances and rituals, and it’s still used today for “smudging”. Smudging is the practice of burning white sage or other botanicals to release smoke which is used to purify places and people.

If you’d like to try white sage as an incense, you can buy sage smudge sticks or loose white sage from Wandering Bull or Crazy Crow.

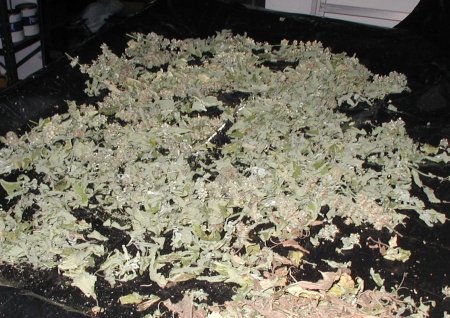
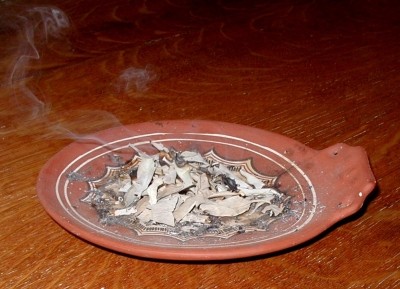
White sage burning.

We burn white sage to purify the air and to enjoy its aroma as an incense.

Light a small handful of sage on a heat-resistant dish and walk around the house to purge the atmosphere of any lingering stale air. We find the scent very pleasing and not at all like the incense sticks available in retail shops.

Sage that you might put in your turkey dressing or poultry stuffing is not the same thing as White Sage. Even though culinary sage, Salvia officinalis, has a pleasing scent when crushed or used in cooking, it only seems to go with turkey or poultry. Does anyone use sage in the kitchen for anything else?

Sage is a lovely, perennial plant of the herb garden and there’s more to harvest each year than we would ever use. Too bad it doesn’t give off the pleasing aroma that White Sage does when it’s burned.

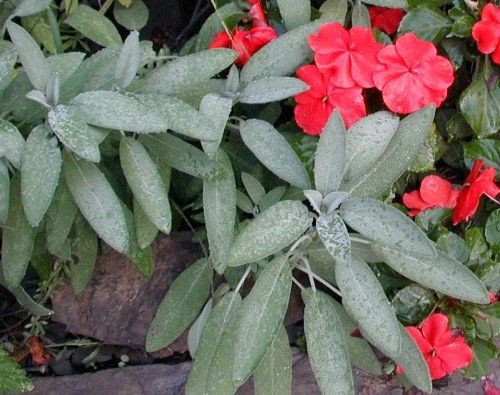
Garden sage.

Sage in the herb garden grows 2-3 feet tall. Here, sage is next to a red impatiens.

Oval-shaped leaves of sage are heavily textured and appear “crinkley”. A white bloom is typically present and the opposite leaf pairs have long stems.

Textured sage leaf.

Textured leaf of culinary sage.

Sage would make a beautiful addition to an herb garden, along walkways, or used in place of other shrubbery. Ornamental varieties are available with variegated leaves and some beautifully colorful flowers. Check out the red-flowered sage Salvia greggii ‘Wild Thing’ from Spring Hill.

As you know Fall is a great time for planting perennials. See what you can find at this sale: Spring Hill Perennials – $25 Off $50. While you’re there search for “Wild Thing” to see the red-flowered sage.

Sweet Annie Smells Like the Old General Store

We harvest plants for many reasons. The plants in the vegetable garden and other edibles, like blackberries, elderberries and blueberries, provide for our sustenance and good health. The herb garden plants also find their way into the kitchen where they’re hung to dry for the cook. Other plants are harvested for their beautiful flowers and still others are gathered and dried for their medicinal content or used in crafts and decorations.

I’m sure it doesn’t surprise anyone that some herbs are appreciated for their scent alone. Who wouldn’t like to lay their head on a lavender pillow?

Another example of an herb that is appreciated for its scent is called Sweet Annie, Artemisia annua. Sweet Annie is also known as Annual Wormwood, but I like the more descriptive Sweet Annie.

Sweet Annie has been used for a long time as a natural room air freshener. Folks in the old general store would hang a bunch of Sweet Annie from the corner of a room to cover up musty odors. In the olden days, and most likely in many Amish and Mennonite homes yet today, Sweet Annie would be hung in the pantry to give a pleasing scent, but also to act as a pest deterrent. We have a small bunch hanging from a towel rack in the bathroom.

Sweet Annie is grown in herb gardens for its aromatic foliage, but it has escaped cultivation to become established in the U.S. Even though it can be classified as an alien weed, Sweet Annie is here to stay.

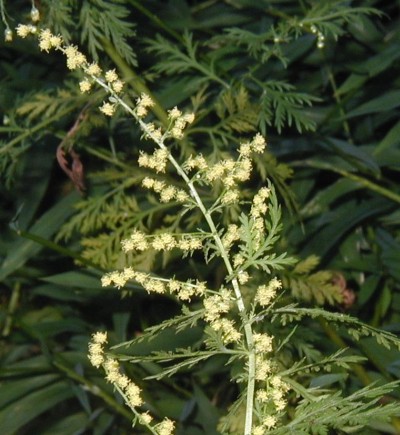
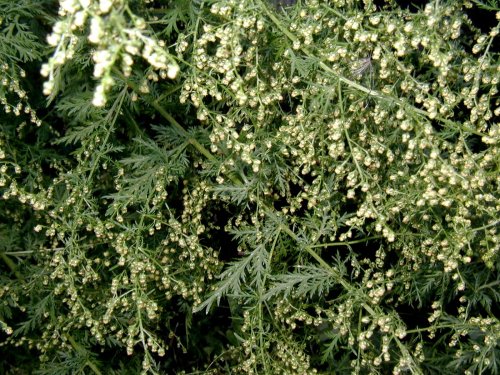
In the following picture you can see the numerous small, hanging flower heads. As a member of the composite family Sweet Annie will produce many small seeds from each little flower. Its flowers are tiny, yellow-green and ray-less.

Small yellow flowers of Sweet Annie.

Holding up the Sweet Annie stem, you can see the spikes of yellow flowers rise up from the leaf axils.

Many blooms of Sweet Annie.

Ok, do you think Sweet Annie has a chance of re-seeding itself?

Remember, it’s a composite family member so each little yellow bloom will produce several smaller-than-poppy-seed small seeds!

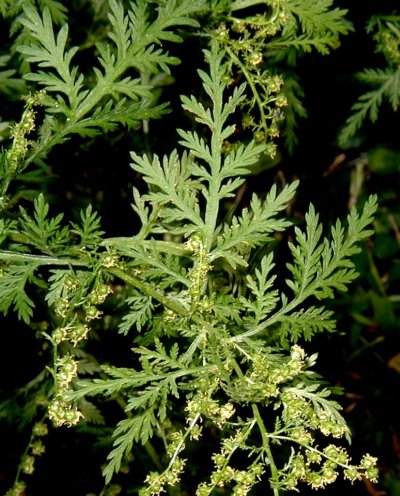
Foliage of Sweet Annie is deeply and finely cut, fern-like, and stands up to 3-4 feet tall. You’ll find it in waste places and along roads.

Leaves of Sweet Annie.

The finely-cut leaves of Sweet Annie.

Related plants in the genus Artemisia are typically very fragrant and include the mugworts and wormwoods.

Leaves and seeds are used medicinally, so Sweet Annie is appreciated for more than just her scent. Leaf tea can be used to treat colds, fevers, and diarrhea, while poultices can be used externally to treat abscesses and boils. Compounds that can be derived from Artemisia annua have been researched for their antimalarial and herbicidal properties.

Red Wiggler Worms Live in a Worm Bin

In nature Red Wiggler worms, Eisenia fetida, can be found among and underneath the leaves and throughout the top layer of soil where materials are available to the worms as a food source. Leaves, decaying plant matter, just about anywhere in this zone that you find decaying organic matter, you’ll find some kind of worm and red wigglers are typically found in the leaf litter.

Homemade worm bins come in all sizes and shapes, but most are variations on a simple plastic box. The requirements for a mini-worm farm are to provide them food and shelter. We’ve already touched on the food part and using a crock to hold kitchen scraps until they can be fed to the worms.

Shelter for the worms means you need to provide a place for the colony to survive, thus the box. Worms in nature are mostly underground or otherwise out-of-sight, so a lid for the box is needed to duplicate a dark, natural place for the worms to live.

As time goes on liquid accumulates in the worm bin due to the natural cycles of material breakdown, so we must provide a way for excess liquid to be removed from the worms’ living quarters. This is where the variation comes in the design of home made worm bins. If liquid is allowed to accumulate in the box your worms will try to find a way out. When this happens the worms usually don’t get too far away before they encounter difficulties and dry up.

Some folks drill or cut holes in the bottom of the plastic box that houses the worms. Liquid is then collected on a tray or in another plastic box. Others invent some sort of tap for collecting the liquid.

Worm juice can be diluted by about 1/10 with water and used as a dilute fertilizer for plants.

Using shredded paper for bedding in a worm bin gives another benefit to the earth in that we can recycle some paper instead of dumping it in a land fill. Also, if the worms run out of food scraps, they will eat the paper!

Saving Food Scraps to Feed the Worms

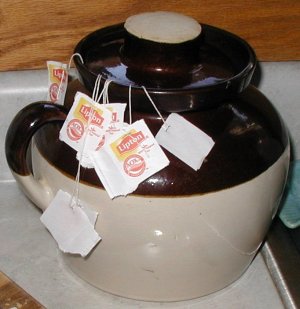
Here’s my little bean pot. It even has a lid! I use it to collect a few days of coffee grinds, tea bags and vegetable scraps from the kitchen.

Bean pot with lid for saving kitchen scraps.

Bean pot with a lid for saving food scraps to feed my worms.

The occasional cutting of a houseplant, bits of string, egg shells, just about anything that’s organic can go in there. Red wiggler worms are not particular about the rotting organic foods that we offer to them in our little worm bins. They’ll even eat the paper bedding.

The only types of foods that are recommended NOT to be fed to your worms are oil-based foods, like meats, cheeses or oils. Any dinner plate scraps go to the dogs while food preparation scraps go to the worms.