Saving Food Scraps to Feed the Worms

Here’s my little bean pot. It even has a lid! I use it to collect a few days of coffee grinds, tea bags and vegetable scraps from the kitchen.

Bean pot with lid for saving kitchen scraps.

Bean pot with a lid for saving food scraps to feed my worms.

The occasional cutting of a houseplant, bits of string, egg shells, just about anything that’s organic can go in there. Red wiggler worms are not particular about the rotting organic foods that we offer to them in our little worm bins. They’ll even eat the paper bedding.

The only types of foods that are recommended NOT to be fed to your worms are oil-based foods, like meats, cheeses or oils. Any dinner plate scraps go to the dogs while food preparation scraps go to the worms.

Worms in Bin Recycle My Kitchen Waste

Worms are our friends. They convert lots of organic material as part of Nature’s food webs. We can take advantage of this fact by farming with worms, where the desired product is compost, a source of available nutrients for plants.

Recycling food waste and house plant clippings into compost is very desirable. We can save on the expense to haul the waste away and get a beneficial product in return for a few moments of our attention. It takes only a few minutes to separate food wastes or plant clippings into a separate container for feeding your worms.

Feeding your worms can be as easy as opening the cupboard under your kitchen sink, raising the lid on the worm bin and throwing in the scraps – no meat, cheese, or oils, please. Ours is in the garage, so we place kitchen scraps in an old bean pot that sits on the counter by the sink. It took me forever and many a flea market to find one with a lid, but persistence pays off!

There are more modern-looking solutions to the bean pot. Just make sure you get a compost bucket with a lid!

It’s easy to get started recycling your kitchen waste into compost gold.

Six steps to recycling kitchen waste:

  1. Get worms. Use Red Wiggler worms.
  2. Set up bin. Large plastic container with lid and tray or spigot to remove excess liquid and air holes for the worms.
  3. Get crock. Pail with a lid or compost container for holding kitchen waste.
  4. Tear up newspaper. Any paper will do fine for bedding. Newspaper, envelopes, junk mail, old bills, any paper, colored or not.
  5. Add worms to moist bedding and empty food waste crock into bin.
  6. Keep moist. Use a spray bottle to keep moist or soak paper in water before adding to bin.

Compost has been shown to be a rich source of nutrients for plants. The nutrients in worm castings, as their poop is called, are highly available, which means that the nutrients in compost are more easily absorbed or used by the plants as compared to the nutrients in chemical fertilizers.

Virgin’s Bower Vines Along the Country Roadsides in Pennsylvania

Driving along a country road here in Pennsylvania you’re likely to see many a roadside weed. Weeds like Queen Anne’s Lace or wild carrot, chicory and goldenrods are flowering everywhere. These weeds are wildflowers to me, but to others they are nothing more than weeds in a field.

My definition of a weed is a plant that grows where you don’t want it to grow. So, by definition, a rose bush could be a weed. These roadside “weeds” are growing right where they’re supposed to grow.

A new wildflower for me is a pretty, four-petaled white blossom called Virgin’s Bower. It’s a vine that grows alongside of Jewelweed, New York Ironweed, Joe-Pye weeds, brambles and thistles.

Virgin's Bower flowering along a PA road.

Virgin’s Bower flowering along a country road in Pennsylvania.

Three leaflets of Virgin's Bower compound leaf.

Compound leaves of Virgin’s Bower, Clematis virginiana, are strongly toothed, in threes and may have purple stems.

Classified as a non-woody vine Virgin’s Bower climbs over brush and, in sunny moist locations, it practically coats roadside vegetation with clusters of white flowers.

Virgin's Bower Vine.

Virgin’s Bower grows like a vine over and on top of other vegetation.

Flower of Virgin's Bower.

Flowers consist of 4 white, petal-like sepals and many white stamens in clusters in the leaf axils.

Young flowers of Virgin's Bower.

Young flowers of Virgin’s Bower just starting to open up.

As with most members of the Buttercup family, Ranunculaceae, Virgin’s Bower contains toxic compounds. Be careful handling Virgin’s Bower as contact can be highly irritating to skin and mucous membranes. Even though the whole plant was used in liniments in the past, some people are sensitive to it. Consuming it may produce upper and lower gastrointestinal upsets and even convulsions.

Anyone having Clematis plants in their garden may recognize the fruit of this native clematis species. Virgin’s Bower fruit has the creative name of ‘Old Man’s Beard’ due to the scraggly appearance of gray, feathery plumes which are attached to the seeds of the female plant.

What do the seeds of the male plant look like? How can you tell the female plants from the male plants at other times of the year?

Keep observing and we’ll learn about it – all in due time, My Pretty!

Lopseed Along the Lane Flowered in July

Lopseed is remarkably purple on the stems and in flowering. In fact the deep purple color is what drew my eyes to it for the first time. Another lane-side inhabitant, Lopseed, Phryma leptostachya, flowered in July here in Central Pennsylvania.

Flowers are about a quarter inch long and placed in pairs along spikes that rise up from the leaf axils and from the terminal stem. As each flower dies back it lays down along the stem giving the plant its name “lopseed”.

Leaves are paired, opposite one another and coarsely toothed.

Lopseed has the distinction of being the only member of its genus, Phryma, due to its unique seed-lopping behavior. Some taxonomists even place this plant in its own family, Phrymaceae.

Young lopseed plant.

Lopseed plant with flower stems arching up from the leaf axils. Photo taken 11 July 2008.

Lopseed plant.

Lopseed, a perennial that reaches 2-3 feet tall, grows in wooded areas. Photos taken 21 July 2008.

Lopping seeds of lopseed.

Blossoming flowers and lopping seeds of Lopseed.

Leaves and stems of lopseed.

Purple stems and opposite, toothed leaves of Lopseed.

Lopseed root tea has been used by Native Americans for treating sore throats and for treating rheumatism. Roots hold some insecticidal powers as evidenced by its use in Asia for treating skin problems and insect bites.

Strawberry Look-a-like – But Only in the Leaves

In Spring I was curious about a plant that looked like a strawberry plant, so I dug up a couple of these weeds and put them in a flower bed. That way I could keep an eye on them and see what they developed into.

Right away I decided they weren’t strawberries because the stem was thick and upright, hairy, too. It also started to branch out.

Strawberry plants have only basal leaves and are vining in their growth habit, not upright and branching. Each strawberry plant sends out runners that reach about a foot away from the mother plant and put down roots to develop another strawberry plant. We have some ever-bearing strawberries, called Ozark Beauty, that are ripening another set of berries right now.

The flowers of my weed are five-parted and yellow, but sort of inconspicuous because the petals tend to curl in a bit. It turns out that my weed is called Rough Cinquefoil, Potentilla norvegica.

Identifying the plant was easy using these characteristics: 5 regular parts, yellow flower, hairy, thick stem, and alternate, palmately divided leaves in threes. Also, the plant gets to be 1-3 ft tall and spreads to 4-6 ft across – much larger than any strawberry plant.

Leaves of rough cinquefoil.

Strawberry-like leaves of rough cinquefoil in threes. Note the hairy stems. Photo taken 16 June 2008.

Rough cinquefoil grows much taller than any strawberry.

Strawberry plants on the left are low to the ground, while the much larger rough cinquefoil plants grow two or three feet tall with some stems laying onto the ground.

Robust leaves of strawberry on the left and thin leaves of rough cinquefoil on the right.

Strawberry leaflets on the left are much broader than the narrow rough cinquefoil leaflets on the right.
Small, bright yellow flowers of rough cinquefoil.

Only a few small bright yellow flowers of rough cinquefoil are open at a time and they last for about a day.

There is apparently no medicinal or edible interest in the rough cinquefoil, so it’s history in the wildeherb garden.

Ozark Beauty, an everlasting strawberry.

Now that I’ve decided to pull out the rough cinquefoil, those Ozark Beauties will have a little more room to send out their runners. Next year we should have a larger harvest of strawberries.

Elderberry Jelly Recipe for Most Delicious Toast

Making jelly is easy when you follow the directions supplied on the box of fruit pectin. Different brands of fruit pectin may be favored by some people for certain jellies or jams, but I don’t have enough experience with using different brands to recommend one over the other. The brands of fruit pectin that we find in our grocery stores are Sure-Jell and Certo. Each little box contains enough fruit pectin to make 5 to 10 cups of jelly or jam, depending on the kind of fruit that you have available and on whether you’ll be using the fruit itself to make jam or just the juice to make jelly.

We figured that elderberries were most like the drupelets of a blackberry drupe, so we followed the recipe for blackberry cooked jelly from the Sure-Jell Premium Fruit Pectin directions.

For the elderberry jelly we cut enough elderberry clusters to half-fill a five gallon bucket. The bucket made to easy to carry scissors into the field and to carry out the elderberries without losing any of the ripe berries that fell off the clusters.

We plucked the berries from the clusters with a twisting motion and collected the berries into a large bowl. From having done this once before I knew that we needed 8 cups of berries for the cooked jelly recipe. We probably didn’t have to remove all the berries from the clusters for making jelly, but at that point of the process we were undecided whether we’d make jam or jelly. Since elderberries have a sizable seed, we decided to make jelly.

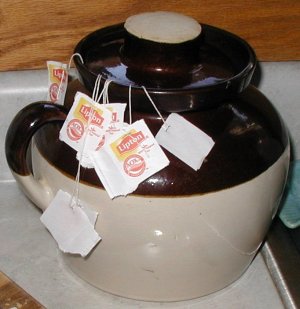
For crushing the berries we used a potato masher and crushed about one cup at a time. The berry mash was transferred into cheesecloth that was draped over another large bowl. The cheesecloth was gathered up and hung from a cupboard door to let the elderberry juice drip into the bowl.

Dripping elderberry juice.

Elderberry juice dripping into a large bowl. Use metal bowls instead of plastic – the plastic ones get sticky from the elderberry juice. Photos taken 15 August 2008.

Set aside most of a day to finish making jelly. It takes a bit of time to collect the juice and inevitably you’ll have to get your hands purple when you squeeze out the last of the juice from the berry mash. It’s ok, it washes off fine with soap and water.

We measured out 3 3/4 cups of elderberry juice into a large Dutch oven, or 6 quart pot, on the stove and added the contents of the fruit pectin packet. Heat was turned on medium-high and the mixture was stirred with a large spoon until the fruit juice-pectin mixture boiled.

Once the boiling was rolling, 4 1/2 cups of sugar was added all at once. With constant stirring the sweetened mixture was brought up to a rolling boil again and left to boil for one full minute.

Jars that had been run through a light cycle in the dishwasher were set up on the counter. Lids were placed in a skillet and boiling water poured over them – they were left to set in the hot water until needed.

Hot elderberry jelly.

Hot elderberry jelly just taken off the heat and sterilized lids in skillet.

Once the jelly mixture was boiled for a minute, heat was turned off and the hot jelly was ladled into the presterilized jars – one at a time. A jar was filled to within 1/8 inch of the top, the rim and screw threads were wiped clean, the lid taken out of the hot water, excess water was shaken from it, then the lid was placed on the jar. The screw band was screwed onto the jar and the jar was tipped over onto its top. Note: tipping jars is not a recommended method of sealing jars, and instead, one should use a canner to give a proper heat seal.

Once all jars were filled, the jars were placed upright in an area where they would not be disturbed until the next day. As the evening went on we heard the lids pop as they became sealed.

The next day we checked that each lid was sealed by pushing firmly on the top of each lid. Any of them that clicked were promptly placed in the refrigerator to be eaten first. The jars that were sealed were labeled and stored in the pantry. Our recipe made 3 pint jars and 4 half-pint jars.

Next August, here’s the supplies that you’ll need to make cooked elderberry jelly:

8 cups elderberries taken off their clusters
potato masher to crush berries
4 1/2 cups sugar
1 box fruit pectin
cheesecloth
string or clamps to tie up the cheesecloth
large bowls
liquid and dry cup measures
large pot to cook in
large spoon for constant stirring
sterilized jars with lids and bands
skillet for lids
boiling water to sterilize lids
paper towels for wiping the jar rims
ladle for adding hot jelly to jars
jar labels

The major brands of fruit pectin do have reduced sugar or sugarless versions, so if you’re diabetic there is still a way for you to enjoy elderberry jelly or jam.

Give it a try and have some fun! The small half-pint jars make great gifts!