Witch Hazel From the Woodlands to the Medicine Cabinet

Witch Hazel is one of my favorite trees. It has really unique blossoms and fruit, a pretty structure to its limbs, and it can be used medicinally. Due to it’s short stature some will refer to Witch Hazel as a shrub.

Witch hazel, Hamamelis virginiana, is a small understory tree that reaches 15 to 20 feet tall. Its branches spread out in a zig-zag manner so the limbs appear crooked. Several trunks are usually present, so each trunk is at most a few inches across.

In Autumn Witch Hazel is the last tree to bloom in North America. In the middle of October you can find it blooming in Central Pennsylvania.

Witch Hazel’s spider-like yellow flowers have four thin, ribbon-like, inch-long petals and usually occur in groups of three.

Witch Hazel flowers.

Yellow flowers of Witch Hazel.

Witch Hazel flowers with long, thin, yellow petals. Photos taken 19OCT08.

The fruit is a woody capsule that contains seeds. A young fruit starts out green and then turns brown as it matures. When ripe, the fruit capsule splits open at the top and two shiny black seeds are ejected some distance from the tree. Empty capsules may persist on the small branches for years.

Fruit capsules of witch hazel.

Woody fruit capsules from a prior year.

Leaves are alternate and oval-shaped with a characteristic unevenness at the base. Leaf edges are scalloped and not exactly toothed.

Witch Hazel oval-shaped leaf.

Witch Hazel leaf shape is oval with scalloped edges.

I didn’t know what witch hazel was when I saw it in the drug store for the first time. Right next to the rubbing alcohol there was a bottle of another clear liquid who’s label promised it was an astringent. Witch hazel was slightly more expensive than the familiar alcohol, so I purchased the latter. We always had rubbing alcohol in the bathroom cupboard for cleaning and sterilizing whatever was needed to be clean and sterile.

Witch Hazel has been used medicinally for a long time, especially in the treatment of skin sores, acne, insect bites, and hemorrhoids. Medicinal use takes advantage of antioxidant, astringent, anti-viral and anti-inflammatory properties.

Witch hazel is used in poultice form when the leaves and bark are available, otherwise extracts or hydrosols are available in over-the-counter preparations.

Tea can be made from the leaves and bark and taken internally to stop internal bleeding. Since it does have antioxidant and anti-inflammatory properties, I wonder if Witch Hazel tea can be used effectively by those suffering from Metabolic Syndrome X?

Small Whorled Pogonia Hiding Among the Sassafras Leaves

The more time one spends outside observing the wilde things around oneself, the more one can learn about their environment. And themselves. A curious mind will travel to many places during a simple walk outdoors, won’t it?

Some people find solace in nature – a closer walk with their thoughts and beliefs. Some find excitement in the wonder of how it all works together and of the beauty of it all.

A couple weeks ago I found a new colony of Small Whorled Pogonia. Near some colorful Sassafras that I was appreciating and photographing, I saw the whorl of leaves of first one, then another and another. I was excited as here was yet another small grouping of a plant that is endangered with extinction.

Clearing of the forests for wood and wood products is the primary cause of the loss of pogonias, at least here in Pennsylvania. Clearing of woodlands for pasture and farmland took its toll on all members of the orchid family that are found in these woods. It’s plain and simple – without the forest habitat the orchids will not survive.

I presume there is some association between the orchids and fungi that is intimately associated with the trees of the mixed hardwood forest. Without that ‘something special’ found in the woods where the pogonias naturally occur, they just won’t grow.

Whether it’s really the Small Whorled Pogonia, Isotria medeoloides, or the more common Whorled Pogonia, I. verticillata, isn’t clear until the little guys can be observed flowering.

In the fall foliage it was easy to spot the pogonias – at least after I noticed the first one. Little cartwheels of faded, brown straw-colored leaves were found hiding among the more colorful Sassafras leaves.

Pogonia orchids in the fall.

A yellow pogonia hiding among the more colorful Sassafras. Photos taken 16OCT08.

Pogonias in autumn.

Whorled Pogonia in the Autumn.

Seven pogonia plants were counted near the base of a Northern Red Oak tree. That makes three separate pogonia colonies in the woods that edge our front and back yards.

Five pogonias in the woods.

Five Small Whorled Pogonias are marked with red rings. The left-most ring contains two pogonias.

I’ll visit each area next year to see how many plants come up and monitor them to see if any bloom.

Making Homemade Ketchup in the Outdoor Kitchen

A fun couple days in the outdoor kitchen this summer happened when we made a batch of ketchup. Homemade ketchup! Ever hear of it? Me neither.

Although we call it ketchup, it’s nothing like the store bought sugary sweet condiment that we’ve all had on a burger or dipped our fries into. Our Country Ketchup is more like a really flavorful tomato paste, but in a pourable consistency. It’s really good on a sandwich, on pasta or potatoes, or as the tomato base for many a recipe.

We started with a bushel of tomatoes and laid those on a table outdoors to let them fully ripen. A couple pounds of Hungarian peppers and a couple of pounds of red bell peppers were laid on the table also. After 4 or 5 days of sun-ripening the two-day cooking of the ketchup could commence.

In the outdoor kitchen we had a propane burner with a 30 pound tank providing all the fuel we needed for all the canning and preserving for the whole summer.

A large granite pot was used to cook down the vegetables. Each tomato was sliced in half, or in quarters if it was a large one, and dropped into a blender. We didn’t take any pains to remove the tomato skin or the seeds. Everything went into the pot. When the blender was about half full it was poured into the big pot.

Peppers were treated the same way, except the inner parts and seeds of the peppers were thrown out and not put in the pot.

I found out about not touching your face or rubbing your eyes after handling Hungarian peppers. Even after I had washed my hands there was still significant “hot stuff” on my hands to cause essential blindness for about 15 minutes. I had rubbed my eyes after washing my hands and wow! The burning was so intense and my eyes watered so badly that I couldn’t see! I just kept them closed because opening them wasn’t possible. The air seemed to make them burn even more. After splashing water on my face, and getting it everywhere, I could still feel the burning but it was diminishing. When I could finally keep my eyes open I saw my face was beet red. A glass of green tea made me feel better, but I learned a good lesson about handling super hot peppers.

We used the Hungarian peppers, red bell peppers, banana peppers and sweet frying peppers in the ketchup. Our tomato selection included a couple varieties of the big slicing type and a lot of Roma tomatoes. Vidalia onions were added to the mix near the end of the cooking, on the second day.

For added flavor we put pickling spices and about 10 green sassafras leaves in a cheesecloth bag that was allowed to hang in the pot during cooking. I tied a piece of twine around the cheesecloth to make a sort of bag. A long length of twine was left so that it could hang over the side of the pot.

A couple cups of sugar and vinegar were added after the soup cooked down for a whole day. We still sliced veggies, blended and poured the veggie juice into the pot and the pot was stirred. Cooking down a bushel of tomatoes and a peck of peppers took a while to say the least. When we got into doing this little project I wasn’t aware that it was a two-day process to make homemade ketchup!

Since the pot was cooking for a day before we added the sugar I’m not sure how far into the recipe we got before we added the sugar. Let’s just say that we were 3/4 done with adding the veggies. Once the sugar was added, we had to be careful to keep stirring the pot or else the sticky sauce would burn on the bottom of the pot.

Taste-testing commenced after the sugar and vinegar were added and allowed to simmer for a while. Too sweet? Add more vinegar.

We bottled the homemade ketchup in Grölsch beer bottles that had been run through a light cycle in the dishwasher. The ceramic cap provides a great seal that can be opened and resealed. The ketchup bottles can be stored at room temperature until they’re opened.

The guy at the wine store sold us a case of the empty Grölsch bottles at a dollar each. If purchased individually, they would have been $1.25 each. I say go buy the beer and enjoy drinking it first. Ah…memories of Amsterdam!

A ladle and funnel were put to good use filling each beer bottle with our delicious ketchup. After each bottle was filled while the ketchup was still hot, the cap was pushed on to seal each bottle.

Doubt the case of ketchup will last a year as it’s so versatile – it goes with everything!

Have you made homemade ketchup? Or is it catsup? Leave a comment and tell us about your outdoor cooking adventures!

Sassafras Tea: An Autumn Treat From the Edge of the Woods

It’s not just the leaves of Sassafras that I enjoy – I’ve always loved this plant.

I remember attending a Scouting function with my family when I was a young teenager. It must have been in the Autumn as I can clearly remember that it was a chilly day.

Reviewing the different booths that the scouts had set up to show their newly learned skills, like a model showing how water erodes hillsides and what that means for trail-blazing, or the knot-tying skills they used to build the cool rope bridge outdoors, I came upon a table where Sassafras tea was offered.

Of course I said I would try a cup of hot tea. After all, it was chilly out there. One sip and I fell in love with the taste of Sassafras tea. It was just like the way the leaves smelled when you crushed them. How delightful! I must have gone back to that booth two more times for more tea.

For a long time after that day I hadn’t seen or tasted sassafras tea. I wondered why I never saw it offered for sale in the stores. I do remember finding some long stick candy that was sassafras flavored, but that was years ago.

It turns out a compound in Sassafras, called safrole, was found to be carcinogenic, and that’s exactly why we don’t see sassafras on store shelves. However, it’s debatable whether Sassafras is more carcinogenic than alcohol. Knowing that most things are ok in moderation, we don’t worry about getting cancer from a cup of Sassafras tea every now and then.

To make Sassafras tea you’ll need to get the roots. Loosen the soil around a small tree to make it easier to pull it up to get the roots. Shake off any excess dirt from the roots and give them a rinse before putting into a pot of water.

Boiling sassafras roots.

Boiling sassafras roots for tea.

Cup of sassafras tea.

A cup of sassafras tea.

If you can get enough roots to save some for later, you’ll need to let the roots dry, then store them in a glass container. The root bark is especially strong with Sassafras essential oil. Just don’t store the roots too long, as the essential oils will dissipate over time leaving your colorful tea pretty much tasting like a dried out tree root.

Boil the roots until the water has turned an amber red color. Drain off the tea and sweeten as you like. Sassafras tea with honey is just delicious!

The Many Colors of Sassafras

Sassafras is one of my favorite plants. Since I was shown as a child that Sassafras has leaves of three different shapes, I always thought it was a really cool plant. Somehow I seem particularly drawn to the mitten-shaped leaves. Guess that’s the kid in me screaming to get out.

Sassafras leaves all have toothless edges. The single leaf is oval shaped and may come to a point at the ends. The double leaf is the mitten shape where a large oval shape would fit the hand and a side lobe would fit the thumb. The third leaf has three lobes where the central lobe is usually larger than the two side “thumbs”.

Loose leaf photos taken 17Oct08 – leaves collected 16oct08.

Sassafras leaf shapes.

The three shapes of Sassafras leaves, from the left are the single, mitten and tri-lobed leaves.

Sassafras, Sassafras albidum, is a medium-sized tree and will reach 30 feet tall. A mature tree will spread by sending up shoots from its roots. The sassafras that we notice at the woods’ edge are usually the young trees. Indeed, I was surprised to learn that sassafras trees can be so tall! I had only ever noticed the little trees while playing around the woods as a kid.

There are only three members of the Sassafras genus, two of which are native to China and Taiwan. Sassafras albidum is native to the Eastern United States.

All the Sassafras species release a pleasant, spicy odor when the twigs, leaves, flowers or roots are crushed. Some say it smells like root beer and that’s because people used to, and some still do, make a root beer from Sassafras root.

Young stems or branches are green and the older ones have a thicker bark that becomes brown and furrowed with age.

The leaves are so pretty in the fall. At the edge of the woods, where you’ll usually find Sassafras growing, or perhaps in an abandoned field, sassafras stands out with yellow-orange or tangerine and fruity colors. Sassafras sports many different colors during Autumn, changing from green to yellow or orange-red and crimson before turning brown and mottled with spots.

Colorful sassafras leaves.

The many colors of Sassafras show yellow, orange, green, red and crimson.

Red, orange, yellow and brown sassafras leaves.

Sassafras rainbow of yellow, orange, red and brown.

Colors changing in sassafras leaves.

Green sassafras leaves changing over to red and orange. Photo taken 10Oct08.

Yellow-orange sassafras.

The more common orange-yellow fall leaf color of Sassafras. Photo taken 10Oct08.

Sassafras and viburnum fall foliage.

The edge of the woods is decorated by the orange-yellow leaves of sassafras and red-purple leaves of maple-leaved viburnum. Photo taken 16Oct08.

Sassafras and viburnum leaf closeups.

Close up view of sassafras on the left and maple-leaved viburnum on the right. Photo taken 16Oct08.

Colorful autumn sassafras.

Autumn Sassafras being colorful at the edge of the woods. Photo taken 17Oct08.

Even the white pine is getting in on the annual color change. A prior year’s needles are turning yellow and will stay on the branches for a week or more before they fall.

Yellowing White Pine needles.

Yellowing white pine needles complement the colorful sassafras. Photo taken 17Oct08.

That’s one thing I love about nature…you look one place and find many interesting things to ponder. For example, one doesn’t think that pine trees will shed their needles because they are evergreen trees, right? Then again, if you’ve been into the woods one thing you’ll notice around the pine trees is that there are plenty of needles on the ground. Pine trees really do shed their needles. It’s funny that the first year we noticed the yellowing of the pines we were worried that the trees had some kind of disease!

Just goes to show that it pays to read and ask questions – you’ll learn a lot more. Keep reading!

Panty Hose Storage of Sweet Vidalia Onions

Such a strange title, I know. But how else are you gonna keep those sweet onions so long?

This early summer I bought not 1 but 2 cases of Vidalia Onions at a produce auction. At a cost of $16 per case and with each case weighing 36 pounds, I knew it was a great deal – less than 50 cents per pound. Obviously, we love onions around here!

We used the Vidalia onions freely throughout the summer in all kinds of cooking. During the hot weather the onions were taken to the cool basement and hung in panty hose, or nylon stockings.

One onion was placed gently in each toe of a lady’s nylon stocking and an overhand knot was tied at the top of each onion. Another onion was put down each leg and another knot was tied on top of each onion. The pattern was repeated until onions filled the legs. The nylons were hung so the onions could hang freely.

Vidalia onions hanging in nylons.

Now that the garage is cooler than the basement, we have Vidalia Onions hanging in knotted nylons in the garage, just outside the kitchen. Note that the onions don’t touch each other.

The only caution here is to to take a pair of scissors and cut below the next to last knot to remove the next onion.

When sweet onions are stored for any length of time the areas where the onions touch one another are typically the first places to decay. For longer term storage of sweet onions it is important to handle them gently, and to devise a way to not let them touch.

Another way to store the sweet onions is to wrap each one individually in newspaper and then store in a refrigerator crisper or drawer section. The newspaper serves the same purpose as the knotted panty hose, which is to separate the onions and not allow them to touch one another. If refrigerator crisper space is limited, then hanging onions in a cool place is preferred.

Our Walla Walla onions from the garden are stored loose in a bin in the garage. We’ve handled them gently to limit bruising and we’ll use them pretty quickly so we aren’t worried about them going bad.

Well, before you think our way of storing onions is getting pretty crazy, you should know we learned it from a fellow who lives in Georgia, near Vidalia country. We’ve used this technique for years and if this year can be a good example, we’ve already stored the onions from early June to early November with no ill effects.

Does anyone else store their Vidalia onions so carefully?

ROI of 250% on Walla Walla Onion Harvest

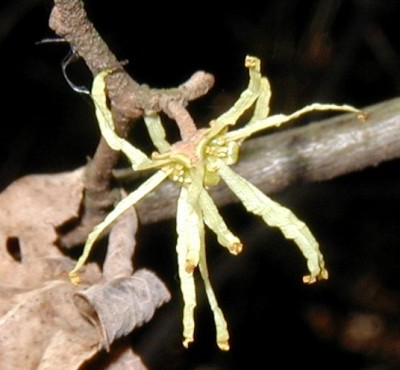
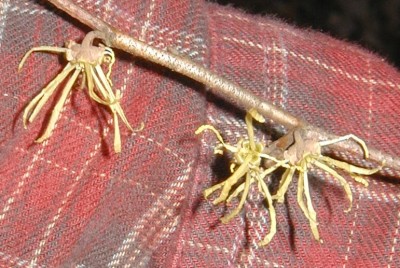
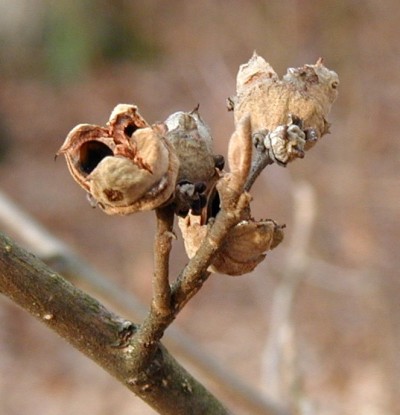
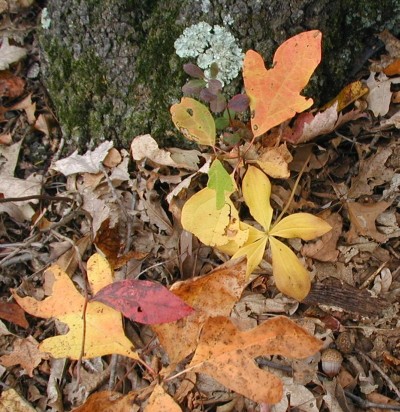
The last stragglers of the spiderflowers, butterfly bush, and heritage flowers lost the fight two nights ago when we had a hard freeze. First night down to 28F killed off the garden for the year. I’ll have to go dig up the canna lilies and dahlia bulbs real soon.

The only thing that appears to not have been taken by the freezing weather is the celery and it still looks remarkably alive. Oh yeah, some lettuce is still growing green. It was re-seeded from previous lettuce plants that were allowed to flower. One kind in particular, an Austrian heirloom type of Romaine lettuce, called “Freckles”, has re-seeded like crazy.

It’s so sad to say goodbye to the summer tomatoes and peppers and basil!

We harvested the garden onions a couple weeks ago. We knew it was time to harvest the onions as the green shoots had pretty much turned brown and had flopped over onto the ground. It was obvious that they weren’t growing any more.

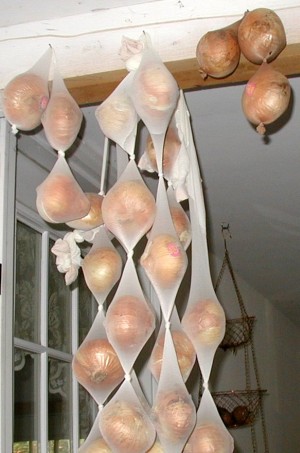
The onions were pulled up and the shoots were cut off a couple inches above the bulbs. Any excess dirt clinging to the roots was brushed off and the onions were laid out on a plastic sheet. The onions were positioned so that none were touching each other and they were allowed to dry for a long week. The sweet Walla Walla onions will be used in the kitchen over the next couple of months.

Freshly harvested Walla Walla onions.

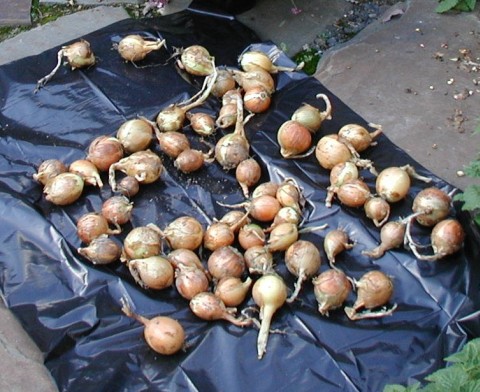
Freshly harvested Walla Walla onions from the vegetable garden. Photo taken on 11OCT08.

Walla Walla Onions were put in the garden as small onions, 1/8 inch in diameter, in late May. We purchased two 6-inch square flats with three rows of the baby onions that numbered approximately 4 dozen per flat. Some onions were eaten as ‘green-tails’ during the summer and we still harvested 50+ small to medium onions.

Dried onion weight is estimated at 5 pounds – at least. We paid only $1.30 for each flat of onions – each producing a row of onions when planted a few inches apart. The ones that were planted too close together were simply eaten first.

For every dollar spent on onion input, we got back at least two dollars worth of onions at the end of the growing season. Seeing that we ate a few of the onions as they grew the benefit was higher than doubling our money, probably closer to tripling our investment. Not that I want to become an onion farmer, but isn’t it nice that we’ve actually gained something in addition to the time spent outdoors?

Let’s see what our return on investment (ROI) was for growing Walla Walla Onions. ROI is calculated by dividing the profit by the total investment and expressing the result as a percentage.

ROI (%) = ( Profit / Investment ) x 100%

For example, our outlay of money was $2.60 to purchase the onions. Since we’ve obtained other benefits for the time and labor spent on planting the onions, tending the onions as they grew and harvesting them, we’ll say our total investment was only $2.60.

Purchasing sweet onions at the grocery store will set you back $1.69 per pound when they’re on sale, or $1.99 per pound at regular price. For a nice round figure, let’s say our harvest was 5 pounds of onions at a value of $8.45 to $9.95, depending on whether you use the sale or regular price of onions. How much are you paying for onions these days?

Profit is figured as the value of the harvest minus the investment, or $(8.45 – 2.60) = $5.85 to $(9.95 -2.60) = $7.35.

ROI ranges from (5.85/2.60) x 100% = 225% to (7.35/2.60) x 100% = 283%. So, on average, we can say that our ROI for growing onions was 250%. If you can get any other investment to give you such returns, you’re probably doing something illegal!

Ok, so we’re not dealing with great big numbers here, but I did get the validation I was looking for. I wanted to know, “Is my time spent gardening going to benefit my pocketbook as much as my mind and body?” The answer is obviously, YES, it is.

It feels really good to eat food that we’ve produced. It feels fantastic to avoid paying the high supermarket prices of today. For a few months I can pass by the onions at the grocer with a big smile on my face knowing that we’re stocked up on our onions.

You may be asking, “But what about the investment of time, labor and fertilizer and such?” I think I hoed the onions only twice this growing season and I may have pulled a few weeds in between hoeings. No fertilizer was used, so there was no other money input. Time spent preparing the soil in the beginning of the growing season can be spread across all the crops.

It’s good activity to keep us young, so the time spent gardening is not considered a cost in growing our vegetables. I’d much rather stay at home and pull a few weeds than drive half an hour to the grocery and give my money to someone far removed from the farmer for food that may have been grown in a far away land!

I’m hoping that more people will return to such wholesome ways as creating a Victory Garden at home. It’s not difficult to do, and actually, vegetable gardening can be very rewarding, and delicious, too!